In this article, we are going to discuss how to fix nail clippers. It isn’t an uncommon occurrence to come back from a shopping spree to find your brand new nail clipper lying broken in your bag. Nail clippers are usually tiny and require delicate handling. They break easily. Now, this can be frustrating to work with- but it isn’t all bad news! Keep reading if you want to find out how to fix nail clippers.
 Luckily for you, nail clippers are very easy to fix as long as you have all the parts. All you need to do is reattach the handle. The other parts will find their rightful places.
Often times, we may take apart our nail clippers to sharpen the blades or manually clean different parts. If you’re doing this with no knowledge of how to piece your clipper back, you’re at the right place!
This guide will tell you exactly how to fix nail clippers. By following these steps, you can transform a broken clipper into a perfect, brand-new version of itself.
How To Fix Nail Clippers?
STEP 1
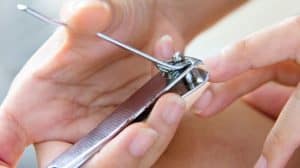
Locate the pin. A pin refers to a circular and rod-like structure that clumps the handle with the rest of the nail clipper. The handle is a lever that you push down to enable the click action to cut your nails.
Next, find the top and bottom holes running through the blades of your clipper. You will have to launch your pin into the bottom hole and bring it out from the top. The notch of the pin should be facing upwards, i.e, it must appear through the top hole.
To distinguish the top hole from the bottom one, look for the pick or the nail file. The surface on which the pick or the file is present is the top side of the clipper. If the clipper is lacking a nail file altogether, both sides can be used interchangeably.
STEP 2
Your next step is to squeeze the clipper blades in between your fingers (use your thumb and your 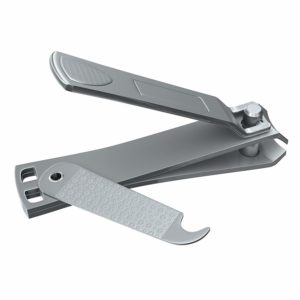 forefinger) simultaneously while holding onto the pin. This is to make sure that the pin does not escape from the whole, in which case you will have to begin the process all over again. Clipper blades are usually tough to handle. If you can’t bring them closer no matter how hard you squeeze, you can use a vice instead.
For easier access in the following step, make sure that the notch on your pin (notch refers to the spot below the curved edge) is facing away from the nail clipper.
STEP 3
It’s time to bring the long-awaited handle into play. Your handle will have an opening on one end. Attach the handle to the pin by inserting it into the notch through the opening end.
You can now release the pin and the clipper blades from pressure. Due to tension created in between the blades by holding them down, the handle will now be screwed firmly into the pin.
STEP 4
Revolve the handle back into its original position to continue trimming nails as usual. Test the strength of its grip by turning it over. To clip nails, you will have to flip the handle upside down parallel to the nail file.
You’ve learnt how to fix nail clippers.
By now, you will have successfully returned a “broken” nail clipper into its original, working form. Why blow money on a brand new nail clipper, when there is a possibility of bringing your old one back to full-fledged use!